Skip to content

OffGridEnclave.com

Living free - Self Sufficient - Sustainable

  • Home
  • Knowledge
  • Projects
  • Community
  • Other
    • News
    • Media
    • 3D-Files
    • Donations
    • About
    • Contact
    • Privacy Policy
    • Log In
      • Forgotten Password ?
  • Home
  • Knowledge
  • Projects
  • Community
  • Other
    • News
    • Media
    • 3D-Files
    • Donations
    • About
    • Contact
    • Privacy Policy
    • Log In
      • Forgotten Password ?

Solar Suitcase

Solar Suitcase – A portable Generator

Here we will be looking at small and portable yet powerfull mini solar system. This system was done as tutorial and training to get some basic experience. The design was choosen to have a electricity supply for power needs during camping and other outdoor activities. Charging the phone, run some small stereo, illuminate a construction site using led’s, etc.. nothing like powertools or such.
This little system is running since 2014 and is always usefull to have around. I can not count how many times it was great to have a small mobile electricity source that recharges itsself.


Technical Stats

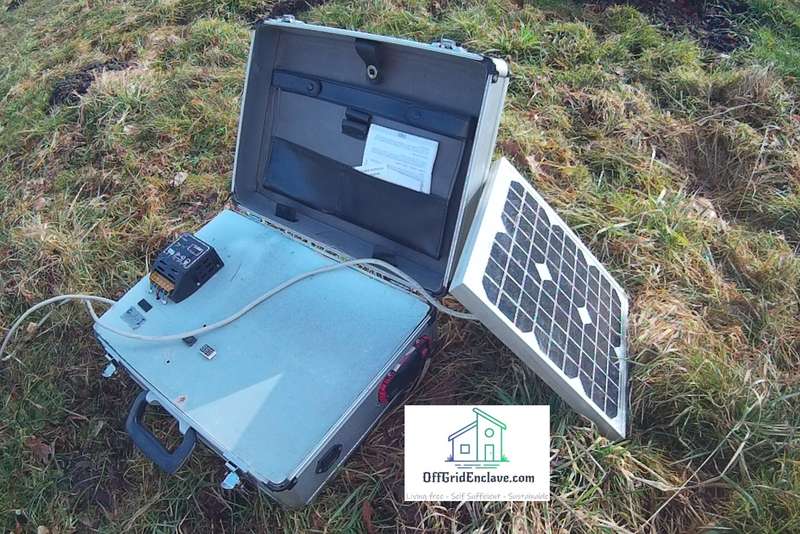
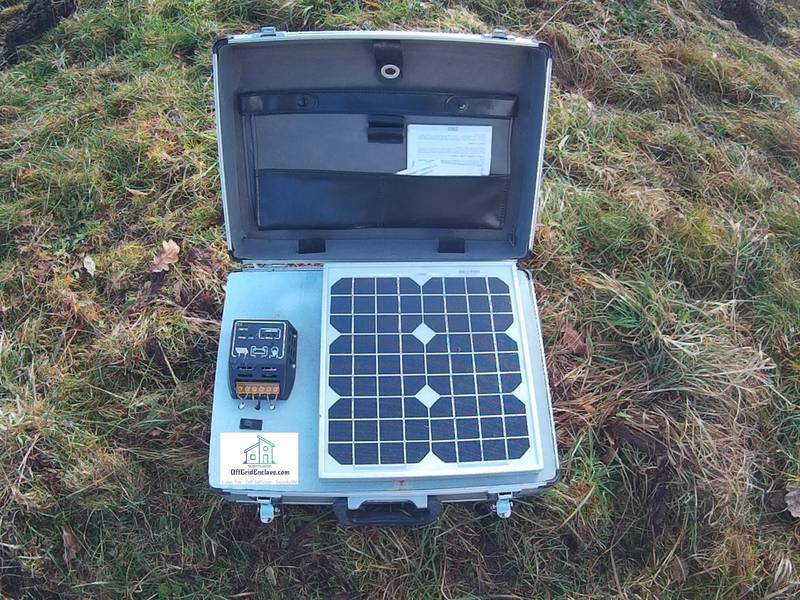
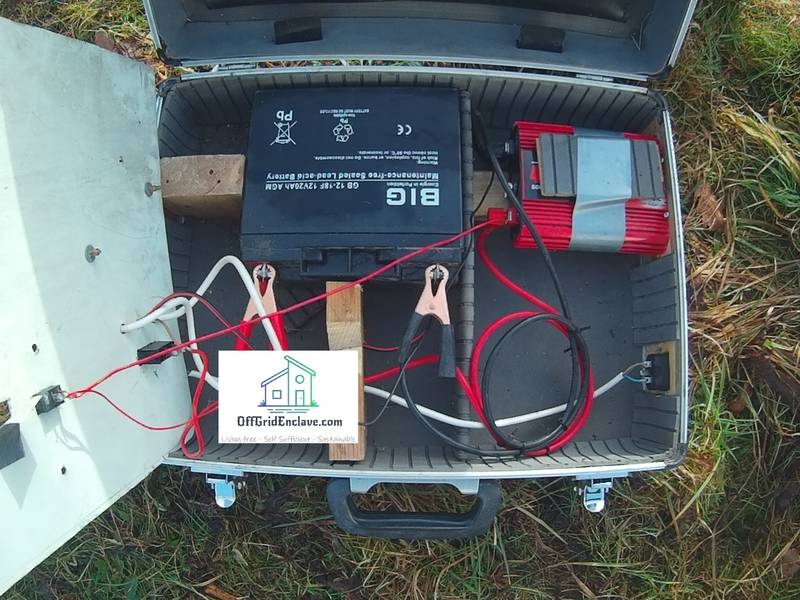
  • 10 Watt Solar Module
  • 5 Ampere 12 Volt Solar PWM Chargecontroller
  • 20 Ah 12 Volt Lead-Acid Gel Battery
  • Voltmeter
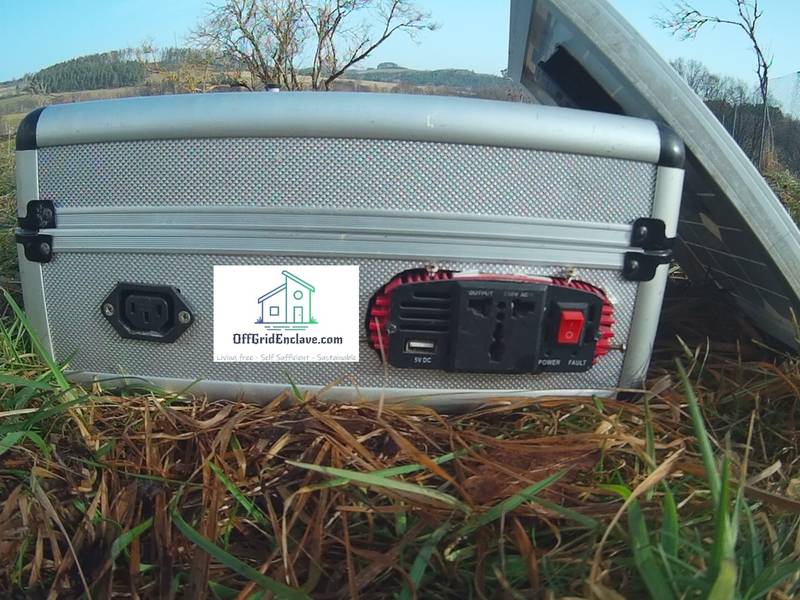
  • 300 Watt Modified Sinus Inverter
  • 5 Volt / 12 Volt / 220Volt Output

Materials used


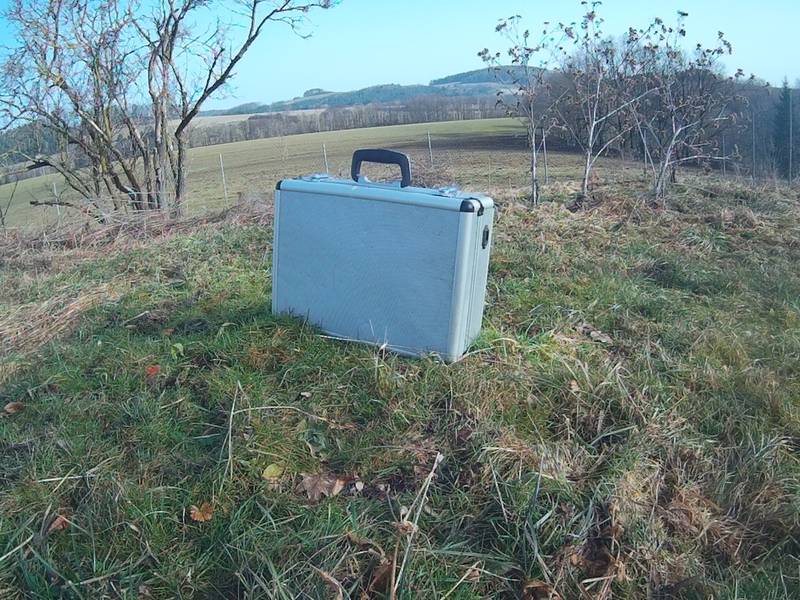
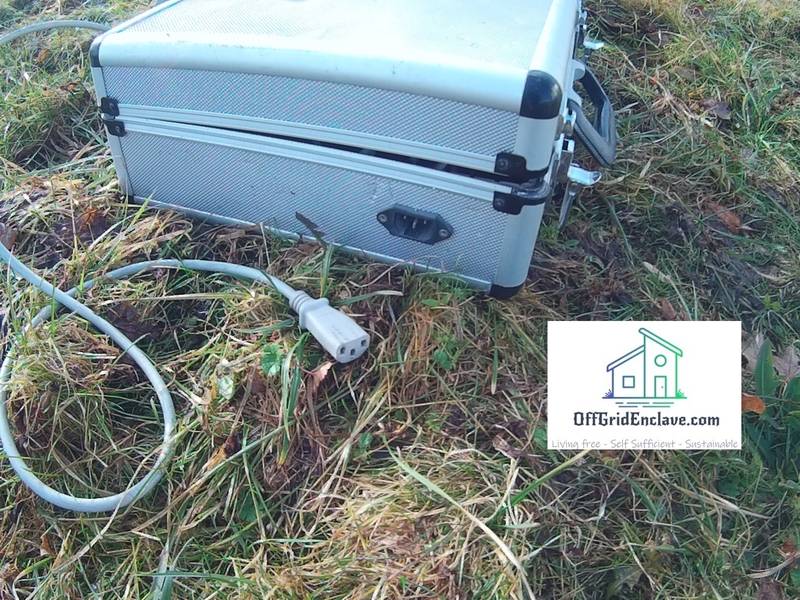
As housing i choose a aluminium suitcase. They are reasonable cheap, very lightweight and easy modifiable. For DIY projects any casing that can house the components should do.

The size of the solar module was picked so it would fit inside the suitcase for transport. The solar chargecontroller supports a lot more power-input so it is possible to have a larger “home station module” to connect the suitcase to. This is highly recommended to have if you DIY this project, as the 10W solar module will take quite a while to charge this battery size.

As mounting for the chargecontroller and the switches i choose a sheet metal plate and cut it with an anglegrinder to fit the suitcase middle bar.

For connections i used the power plugs and cables from computers.
The Plug in the solar suitcase was recycled from a broken pc power supply. These make for smooth connections. As this system will not be getting to much power from the solar panel the cable diameters is not a problem.
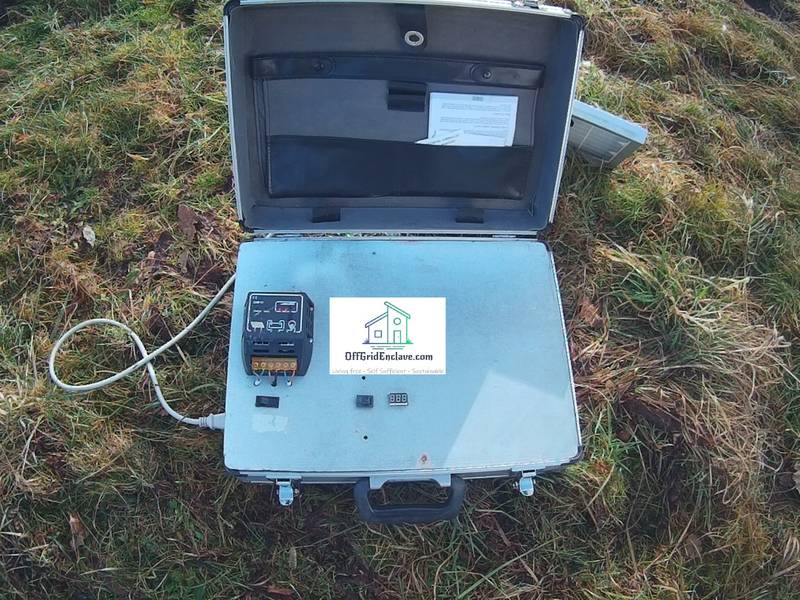

Inside the suitcase

To stabilize the components i used a few wooden blocks that got fixed by screwing them into the suitcase. I made some distance pieces and used ductape to make shure the metal cover and inverter or cables dont touch.
The inverter was fixed to the suitcase using additional screws.


Output

220V and 5V output of the inverter and the 12V output of the chargecontroller are placed to the right side of the suitcase.


Questions, ideas or input on this or many other projects ?!?
Join our community discord server.
Enjoy our You-Tube channel.

  • (0) Comments
  • By
  • Projects

Advanced OffGrid PowerSystems


Advanced OffGrid Power-systems

The Information here are more advanced setups. It is assumend that the reader has the basic knowledge of solar, inverters, charge-controllers, batteries, generators and basic solar-system types. For questions or input join our community discord server.


Redundancy

If a vital system breaks and you do not have a local backup installed or a workaround is deemed impossible you might be in a position of having to source things quickly. Having systems setup from the start that take that into account can ease a lot of stress and basically removes the need for spending “emergency $/€” to workaround something until it gets properly replaced. This should also be taken into consideration for the budget.

Example: having a generator is a legit “workaround” for your electric system, good to use when maintaining batteries, changing cables, installing new solar panels etc, but it is not a “backup” for when your main inverter dies. It is exponentially more expensive to run a full household 24/7 on a generator, to maintain everything while you need to wait for your new inverter to arrive. The proper backup would be to have a 2 inverters setup, use one as default and resort to using the 2nd if the default one fails. If it does, casually order a new inverter; and when it arrives run your generator for 20 minutes whilst replacing the broken one.


Redundant Off-Grid Power-system

For our redundant OffGrid power-system we will be using “OffGrid Inverters”. These house a inverter, solar-chargecontroller, generator/grid-chargecontroller and electronics in a single unit. You can connect to these units via USB and configure them according to your needs.

The idea behind this approach is a maximum of flexibility and redundancy. Having two inverters gives plenty of options for the household, and eases the load on each for bigger houses.
It is recommended to not “hardwire” the battery to utility connection but use plugs and flexible cables. (These plugs are usually used for electric forklifts). If need be you can then always connect any device to any battery. For bad weather conditions this can be great, you have the option to connect all your solar-lines to a single battery. No matter which part breaks or needs maintenance in the setup, your power is sustainable.


TheHappyBunker Power-system

A certified, tested and running system that is used in the HappyBunker project. The location is central Europa in the Czech mountains. This is built to sustain electricity during prolonged periods of fog, clouds, snow and general bad conditions.


For questions or input join our community discord server.


  • (0) Comments
  • By
  • Projects

Microgreens ABC

What are microgreens?

Microgreens are vegetable greens usually grown only week or two, untill the stage of cotyledon leaves have developed or first set of true leaves. They are really easy to grow for even a beginner and require not much.

Basically you need some tray/dish with some kind of medium from soil to even just piece of paper and water. Also you need the seeds and light.


Growing radish microgreens in a week!


Here’s an example grow with the radish. I’m using double black tray with one on top with holes and bottum tray without holes, for watering purposes.

Trays

As of medium I use coco coir, which has very nice characteristic of water retention, so its actually very hard to dry them out and it has worked very well for me. You only need layer 2cm of coco coir. Make sure the coco coir is evenly spread and damp, there should be no pooling of water. Spread the seeds evenly as you can across the growing medium and give light spray of water.

Day 0

Now I cover whole thing with another tray so the seeds are in dark and have light pressure on them. Helps with the speed of germination and the first radicals to figure out the orientation.

Day 1

After a day first radicals are starting to poke out already! Just give them light mist from spray bottle to keep them moist. Some seeds like Cress or Chia are mucilaginous and develop slime kind of substance around them.

Day 2

Another day, and more development! Small white hairs around seeds is not mold, but root hair with which the plant absorb water through osmosis.

Day 3

Here we can see actual vertical growth. And these little things are strong! My sunflower seedlings have no problem lifting even 5kg. But this also means we can flip the top tray, so that they can more easily grow lenght. We want to keep them still in dark for the reason of that we actually want them to grow in lenght, which helps the harvest later on.

Day 3

First roots are also poiking through, which means we can start watering the radish from the bottom and let the suirface part of the plants to get drier, which helps to keep them mold free. Additionally you can use nutrient solution (NPK) for watering and you can also use light hydrogen perocxide solution to further prevent mold. This more important for microgreens with longer germination times, quick one like radish is most likely fine even without.

Day 4

Now it starts to look like correct height. Tomorrow we shall introduce it to the light and get the photosynthesis started. You can use either artificial light or daylight, or combination of both. However don’t expose them to the direct strong sunlight and short winter days are not really enough for the light by themselves. I used for them 150W worth of LED lights, which mostly are blue and red as plants don’t actually use all the wavelenghts of light.

Day 5

Light means green colour, and it happens really quick. We’re actually getting close to harvest already. That was quick!

Day 6

Almost there! All those lovely pink stems. Don’t give them more water for last 12h, this makes them less wet at harvest, which means drier product that lasts at least a week in a fridge.

Day 7

Here we go, ready for harvest. Ones on the side are starting to already fall over, good sign to start the harvest.

Day 7

All done! Nice bag of goodies to use in smoothies, garnishing or part of salad. Microgreens tend to have strong flavors, so use with caution.

Bon Appétit!

  • (0) Comments
  • By
  • Projects

© 2020 All Rights Reserved | OffGridEnclave.com

This website uses cookies to improve your experience. We'll assume you're ok with this, but you can opt-out if you wish.
Detailed information on how we use data can be found in the Privacy Policy section.
Cookie settingsACCEPT
Cookies Policy

Cookies Overview

This website uses cookies to improve your experience while you navigate through the website. Out of these cookies, the cookies that are categorized as necessary are stored on your browser as they are essential for the working of basic functionalities of the website. These cookies will be stored in your browser only with your consent. You also have the option to opt-out of these cookies. But opting out of some of these cookies may have an effect on your browsing experience.
Necessary
Always Enabled
Necessary cookies are absolutely essential for the website to function properly. This category only includes cookies that ensures basic functionalities and security features of the website. These cookies do not store any personal information.
SAVE & ACCEPT